In previous post, I had explained how you can get started with ionic framework. Now in this post I will walk you through the code and will explain the architecture of project.
In this post we will be making a simple calculator.
Make sure you have installed ionic.
In terminal run following command to check if ionic is installed or not.
ionic -v
If installed, it will return the version of ionic. If not installed then follow this article to install it.
Now run this command to create a blank application.
ionic start calculator blank
Your terminal should look like this

Now navigate to calculator directory
cd calculator
Now run this command
ionic serve
It will start the node server (http://localhost:8100/)

I am using safari browser and its responsive design mode.
I will strongly recommend webstorm editor. You can get it free if you have your college id.
Here is how the project structure looks like

Open config.xml

For us, this is the most important file for app configuration. You can change the name,id and other settings of the app in this file.
For now forget about other folders (I will explain later on) and open www folder. Now inside www, we have 4 folders and 1 index.html file.
- css – this folder has style.css, we will put all our css code here.
- img – folder will contain all the images we will be using in the app.
- js – this folder contain app.js (will explain later)
- lib – this folder has ionic libraries.
- index.html (this is the main file. When we open the app, this html file gets loaded first and then it loads all the dependencies)
Lets go through the code of index.html
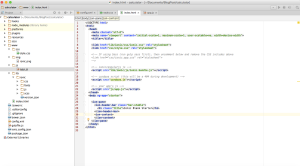
You can see index.html contains all the dependent css, and js files.
Lets change the title of header. Replace Ionic Blank Starter with Calculator.
<ion-header-bar class=”bar-stable”>
<h1 class=”title”>Calculator</h1>
</ion-header-bar>
Above code is for header section
Below is the code of main content. <ion-content> section contains the code of main content.
<ion-content>
<h5 style=”text-align: center;”>A simple calculator which can perform addition, subtraction, multiplication, and division.</h5>
</ion-content>
This is how your app should look now.

Now lets create the UI of calculator.
Replace your index.html code with following
https://github.com/neelkamal0666/Calculator/blob/master/www/index.html
In css/style.css, add css codes from here
https://github.com/neelkamal0666/Calculator/blob/master/www/css/style.css
Now you app should look like this

Your calculator is ready now.
How to create apk file and check it in your android phone.
In terminal navigate to your project folder then run following commands
$ ionic platform add android
$ ionic build android
If you get permission issue (in mac/ubuntu), then add sudo before these commands.
Now check for apk file in
/calculator/platforms/android/build/outputs/apk/android-debug.apk
You can download the entire source code used in this tutorial from git hub repo.
https://github.com/neelkamal0666/Calculator


